Diy Water Softener Replacement
Add 3 gallons of clean water to the salt tank. The first thing that you need to do is to determine the amount of resin needed by your water softening system.
How Much Water Should Be In My Water Softener Brine Tank? Handyman tips

Do this by running the softener through a manual regeneration.

Diy water softener replacement. Service and repair of water filtration systems: If it doesn't make sense to spend the money on repairing your old water softener, this video will show you how to replace it. Autotrol valves use flappers to control the flow of water for regeneration.
Using a professional water treatment dealer likely carries a higher price tag, but this is one investment that’s well worth it. This video shows you have to change your water softener filter. However, if you have an older water softener and the rebuild doesn’t fix the problem, you won’t have wasted your time because you may have to replace the resin bed as well.
Slowly open the bypass valve and check for leaks. The older 155 & 255 autotrol used a 440 or 440i timer assembly. Its submitted by management in the best field.
Water softener tank replacement for diy homeowners water softener tank water softener tank replacement is easy to do normally. Remove valve, dump media out, sanitize the tank with bleach and water, rinse, refill. Measure how tall the tank is, not including the control valve on top.
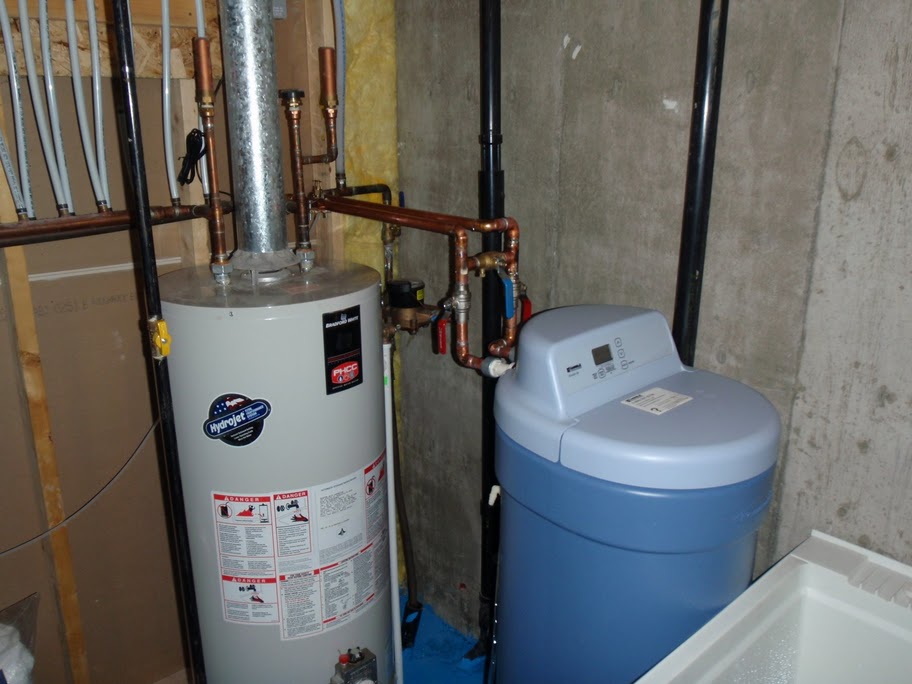
Water heater and water softener installed diy home improvement plumbing home diy water softener sediment filter and pressure tank install water treatment water purification system water softener pin on o2 softener Run the water softener through a full regeneration. Step 3 set the bypass valve.
How to replace old valve. Replacing the resin can take up as much as about 4 hours of your time and save you anywhere from $100 to $150 in professional fees. Turn off your water supply at the main line.
Since hourly rates for water softener repair technicians vary so widely, as for a quote over the phone and get one more than one estimate for the repair. Then remove the injector cap and injector (photo 5). To start with, your water softener will require salt.
Look at how long the resin is anticipated to last by the manufacturer. You will also need to make sure that you are using a high quality resin. To advance it through a regeneration place a phillips screwdriver into the center of the clear cap.
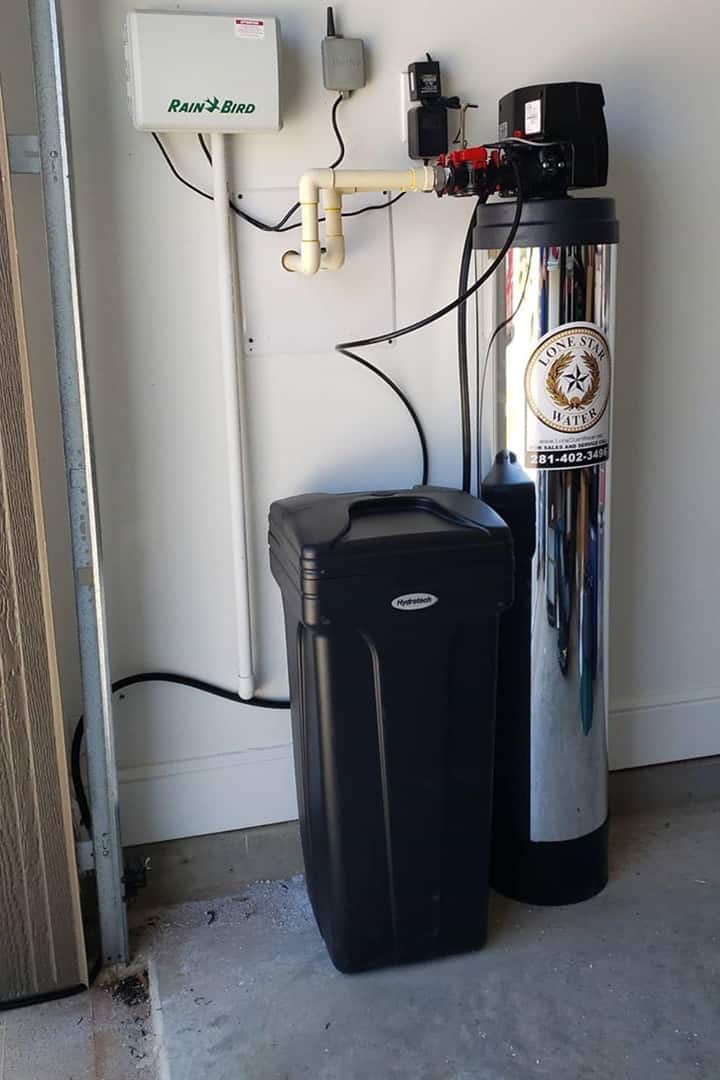
Here are a number of highest rated water softener replacement pictures on internet. The bypass valve is at the back of the water softener. Remember not to measure around the tank.
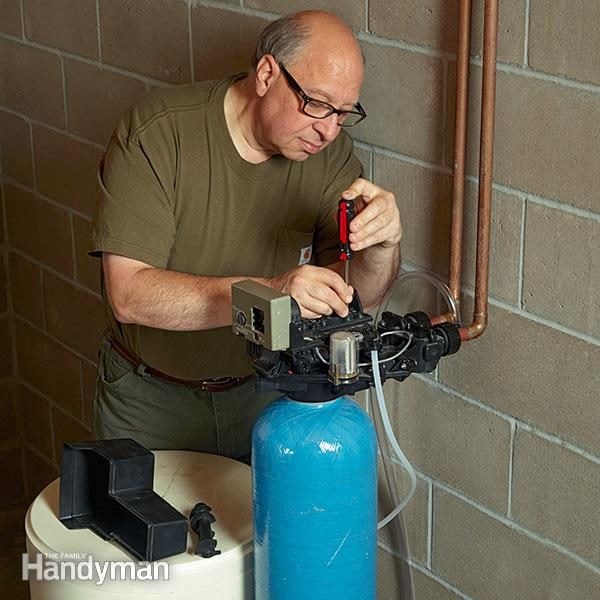
Replace the worn valve discs with the new ones from the kit (photo 4). You may have a little water under pressure that will leak or squirt out when you unhook the lines. Then grab the piston and pull it straight up (photo 1).
Should be done about once a month. Tilt the housing and lift it off. We identified it from trustworthy source.
Diy water softener replacement sunday, may 1, 2022 edit. It is on the main water pipe. Ad shop and save on water filters, water softeners, water testing kits, and more!.
Simply measure your current tank that you are trying to replace. Generally, your next steps will be to fill the brine tank and program the unit’s settings. Plug in the water softener.
To know if you need to replace resin in your water softener tank, there are a few things you can do: Place the softener brine well in its place in the brine. Consider how long you’ve owned your water softener.
Simply mix ¼ cup of bleach with 2 gallons of water and let it sit in the tank for about fifteen (15) minutes. And then measure how wide the tank is. If you are doing it for a living, there are pecial tools that make changing resin a 5 minute job but these tools are fairly expensive.
If you have an electric water softener be sure that you are plugging the unit into a gfi outlet. How to replace a water softener. You will hear the air and then the water running to the drain.
Think of the entire process as buying integrity. How a water softener works. Press the rubber portion of each disc into the water softener valve body until it’s flush.
Next, remove and check the screen cap (photo 7). Not much more than that. The next step is to release the water pressure.
Increase your water pressure and keep the w. Plug in the power supply and enter your home’s preferred settings by following your manual instructions, or reading our softener programming guide. Turn off water supply at main drain water lines make proper connections (optional:
Put the water softener into back wash and open up the inlet of the bypass about ½ way and fill up the tank. Then remove the back cover, the housing screws and the screw in the center of the main piston. Gather your tools, including an adjustable wrench, utility knife, bucket, bleach and water softener salt.
A common problem with a water softener is the injector sometimes becomes blocked with salt.in order to fix this, activate the softener bypass valve first as this will shut off the water. Clean the resin tank injector: Sponsor paid advertisement jan 29, 2022 ## this is a sponsored advertisement.
Water softener units all require slightly different setups once they’ve been installed. Replace the brine refill check ball (photo 6). Diy water softener replacement do this by running the softener through a manual regeneration.
But the following tips will ensure your system lasts as long as possible. Step 1 unplug the power supply to the existing water softener. Affordable and effective water filter solutionsto suit your taste and water type
Next, remove the spacers and seals (photo 2). If you’ve owned it for around eight years or longer, it might be time for new resin. We undertake this kind of water softener replacement graphic could possibly be the most trending topic bearing in mind we share it in google help or facebook.
Disconnect the unit from your plumbing (see your units manual), and move it out to where you will have room to work. The softener head can be overhauled for $60 to $100 or the resin bed can be replaced. It is where the copper pipe meets the water softener pipe.
Unplug the unit from the electric source. While pushing down on the actuator, turn clockwise until the actuator contacts the control disc and it turns. After about 4 or 5 minutes you can open the valve all the way and check for leaks.
What Size Of Water Softener Do I Need Replace A Water Softener Resin
How to Install a Water Softener Aquatiere Top Water Filter Company UK

EASY DIY WATER SOFTENER MAINTENANCE VIDEO YouTube

Mains Water Whole House Above Ground CT Filtration

Diy Water Softener Replacement Resintech CG8 Water Softener
How To Install Water Softener Video Part 2 Water softener system

Water Softeners, Conditioners and Filters Family Handyman Water
How to Repair a Water Softener (DIY) Family Handyman

DIY install of water filter for ice maker — Rinker Boat Company

Fix Water Softener Leaks Pacific Brand YouTube

HOW TO MAKE DIY WATER FILTRATION , DIY FILTER FOR YOUR POND, KOI
Water Softener Problems The Family Handyman

Create a SelfContained Water Filtration and Dispensing System » SHTF
Need to replace water softener. Plumbing Forums

DIY Water Softener Maintenance Water softener, Softener, Home

Water Softener Installation How and When to Rebuild The Family Handyman
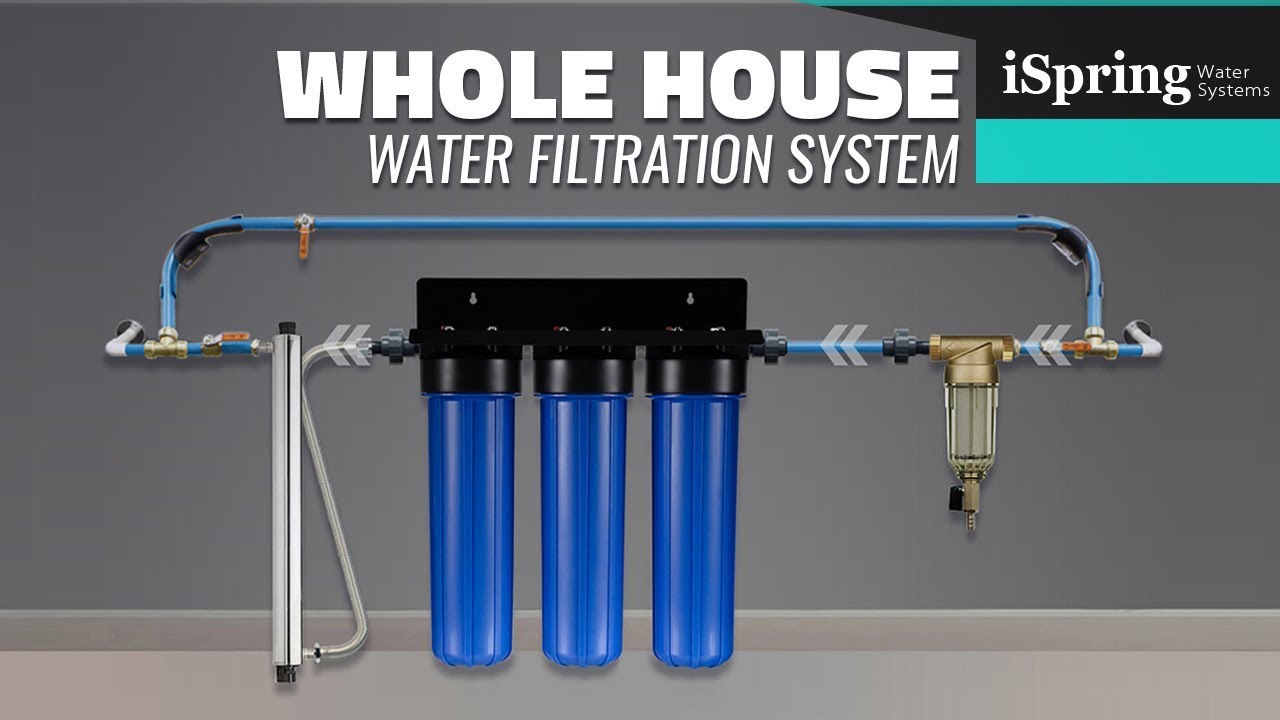
DIY Installation Guide to iSpring Whole House Water System and How to
Aquasana Review Wholehouse Water Filtration System, Overview and

How to Install a Water Softener DIY and Repair Guides